How to Install 3D PVC Wall Panels, Step by Step
Short answer: Glue-up 3D PVC panels are not peel-and-stick. Plan the layout from a center line, dry-fit the panels before any glue goes on, cut with scissors, apply construction adhesive to the back of each panel in a perimeter bead and a grid, press it to your line, and hold it in place while the adhesive sets. On ceilings, add screws or mounting strips as well. Most of a clean result comes from the planning, not the gluing.
| Where you're installing | Use | Why |
|---|---|---|
| Interior wall, sound and dry | Construction adhesive | Bonds the panel to the wall for good |
| Ceiling | Construction adhesive plus screws or mounting strips | Adhesive or tape alone may not support overhead weight over time |
| Suspended ceiling grid (2x2 or 2x4) | Not suitable | The grid tiles can't carry the panels |
| Shower or tub surround, floor, outdoors | Not suitable | These panels are made for dry interior walls and ceilings |
| Around a fireplace opening, stove, or heater | Not suitable | Construction adhesive makers list high-heat areas as a limitation |
Before You Start: Check the Wall
- Sound, flat, clean, dry. Wipe off dust and grease. Scrape and patch flaking paint. Panels follow the wall, so a bad bow or bump will show through and make seams hard to line up. Hold a long level against the wall to find high and low spots.
- Painted drywall is the usual surface. On anything else (existing tile, paneling, brick, plaster), check that your adhesive's label lists that surface. Strip wallpaper first; adhesive holds only as well as whatever it's stuck to.
- Fresh paint needs time. If you just painted, let it cure before gluing over it. Check the paint can for the cure time.
- Pick a dry, ventilated room. Living rooms, bedrooms, offices, and game rooms are typical. Keep panels away from wet areas, walls that bake in strong direct sun, and anything next to a heat source.
- Know it's permanent. Construction adhesive is designed not to come off. Taking panels down later usually means repairing the wall. Renting? Get your landlord's written approval, or read wall panels or peel-and-stick tile.
Tools and Materials
- Panels, plus 10 to 15 percent extra for cuts (more for a diagonal layout or a wall with many openings)
- Heavy-duty construction adhesive (we recommend Liquid Nails) and a caulk gun. Adhesive isn't included in the box. Check that the label lists PVC or vinyl among the materials it bonds
- Scissors for cutting panels
- Tape measure, pencil, and a level (a laser level makes the center line easy)
- Painter's tape to hold panels flat while the adhesive sets
- Damp cloth and the clean-up solvent your adhesive label names (often mineral spirits) for squeeze-out
- Gloves; construction adhesive is hard to get off skin
- For ceilings: a drill, screws, and mounting strips (furring strips), and a second person
- For outlets and switches: a screwdriver and electrical box extenders
How Many Panels Do You Need?
Measure the wall's width and height in feet and multiply to get square feet. Subtract large openings like doors and windows. Divide by the coverage printed on the box, add 10 to 15 percent, and round up to whole boxes.
Example with our panels (19.7 by 19.7 inches, 12 per box, 32.29 sq ft per box): a 10 by 8 ft wall is 80 sq ft. 80 ÷ 32.29 = 2.48 boxes; with 15 percent extra that's 2.85, so order 3 boxes. Keep the spares. They match your batch if a panel ever needs replacing.
Plan the Layout
- Let the panels sit in the room for a day so they're at room temperature when you start.
- Open every box and check the panels. Set aside any with chipped corners or creases for cut pieces at the edges.
- Dry-lay a few rows on the floor. Square 3D patterns change with orientation. Rotate panels to find the look you want, then pencil an arrow on the back of each so they all go up the same way.
- Find the center line. Mark a plumb vertical line at the middle of the wall and a level horizontal line about one panel height above the floor (or trim). Starting from the center gives equal-width cut pieces at both ends instead of one sliver in a corner.
- Mark outlets and switches. Measure each one's position from your lines so you can transfer it to the right panel later.
- Consider painting the wall first. Paint the area behind the panels a color close to the panels (dark for black panels, white for white). Any small gap at a seam then disappears instead of showing a stripe of the old wall color. It's a common installer's trick and costs one coat of paint.
Step by Step
- Start at the center. Hold the first panel on your line, unglued, and check it sits flat and square.
- Apply adhesive. Run a bead of construction adhesive around the back of the panel about an inch in from the edge, then a grid or a few lines across the middle. Staying in from the edge keeps adhesive from squeezing out onto the face. Glue one panel at a time.
- Press it into place. Line the panel up with your marks and press firmly across the whole face, not just the center. Most construction adhesives give you a short window to slide a panel into line. The label tells you how long.
- Support it while it sets. Run strips of painter's tape across the panel onto the wall to hold it flat. One adhesive maker calls for 24 hours of support while its adhesive cures.
- Butt the next panel tight. Work outward from the center, row by row, matching the pattern direction you chose. Press each seam flat and check your level every few panels so small errors don't add up.
- Wipe squeeze-out right away. Uncured adhesive cleans up with a damp cloth or the solvent on the label; cured adhesive has to be scraped.
- Cut the edge pieces last. Measure each gap at top and bottom (walls are rarely square), mark the panel, cut, and test-fit before gluing.
- Let it cure. Leave the tape on for the time your adhesive label gives, then peel it off gently, pulling back along the panel rather than straight out.
Cutting Around Edges, Corners, and Outlets
- Straight cuts: Mark the line on the back with a pencil and a straightedge, then cut with scissors. Cut a little long and trim; you can't add material back. Some installers prefer a fine-tooth saw for long, perfectly straight edges. Test on a spare piece first.
- Inside corners: Butt the cut edge into the corner, so the factory edges stay where they show.
- Outside corners: Cut both panels flush with the corner edge. A corner trim piece gives the cleanest edge.
- Outlets and switches: Turn the circuit off at the breaker and remove the cover plate. Transfer the box outline to the panel, cut the opening slightly larger than the box (not larger than the cover plate), and glue the panel in place. Because the panels add depth to the wall, use a box extender so the cover plate sits flat and the device stays secure. If you're unsure about anything electrical, call an electrician.
Optional Finishing: Caulk and Paint
Neither step is necessary; the panels are finished as they come. If you want them:
- Caulk the seams. A thin bead of caulk in a color close to the panels can hide hairline gaps at seams and edges. Wipe it smooth before it skins over.
- Paint the panels. The solid-color panels can be painted for a custom color. Let the adhesive cure fully first, clean the surface, and test your paint on a spare piece before you do the wall.
Ceilings
Ceilings are where panels most often fail when installers rely on adhesive alone. Gravity works on the panel the whole time the adhesive is curing, and after.
- Find the joists and mark them on the ceiling.
- Screw mounting strips across the joists if you need a flat, continuous surface to fasten to.
- Glue each panel the same way as on a wall.
- Fasten it. Drive screws through the panel into the joists or strips. Don't rely on adhesive or tape alone.
- Work with a helper. One person holds the panel flat while the other fastens.
Don't attach panels to a suspended ceiling grid (the 2x2 or 2x4 drop tiles).
What Can Still Go Wrong (and What to Do)
| What you see | Likely cause | What to do |
|---|---|---|
| Panel edge lifts or the panel won't stay flat | Adhesive only in the middle of the panel, dust on the wall, or no support while it set | Press it back and tape it flat while the adhesive is still workable. If it has cured, pull it, scrape, clean, and re-glue |
| Seams don't line up | Wall not flat, or error building up from one corner | Re-check the level every few panels. Start from the center line on the next wall |
| A thin line of old wall color shows at seams | Small gaps between panels | Paint the wall behind the panels close to the panel color before you start |
| Panels on the ceiling sag or drop | Adhesive or tape alone overhead | Add screws into joists or mounting strips |
| Adhesive smudge on the face | Bead too close to the edge, or too much adhesive | Wipe immediately while uncured. Keep the bead about an inch in from the edge |
| Cover plate won't sit flat | Panel adds depth in front of the electrical box | Install a box extender |
Our 3D Wall Panels
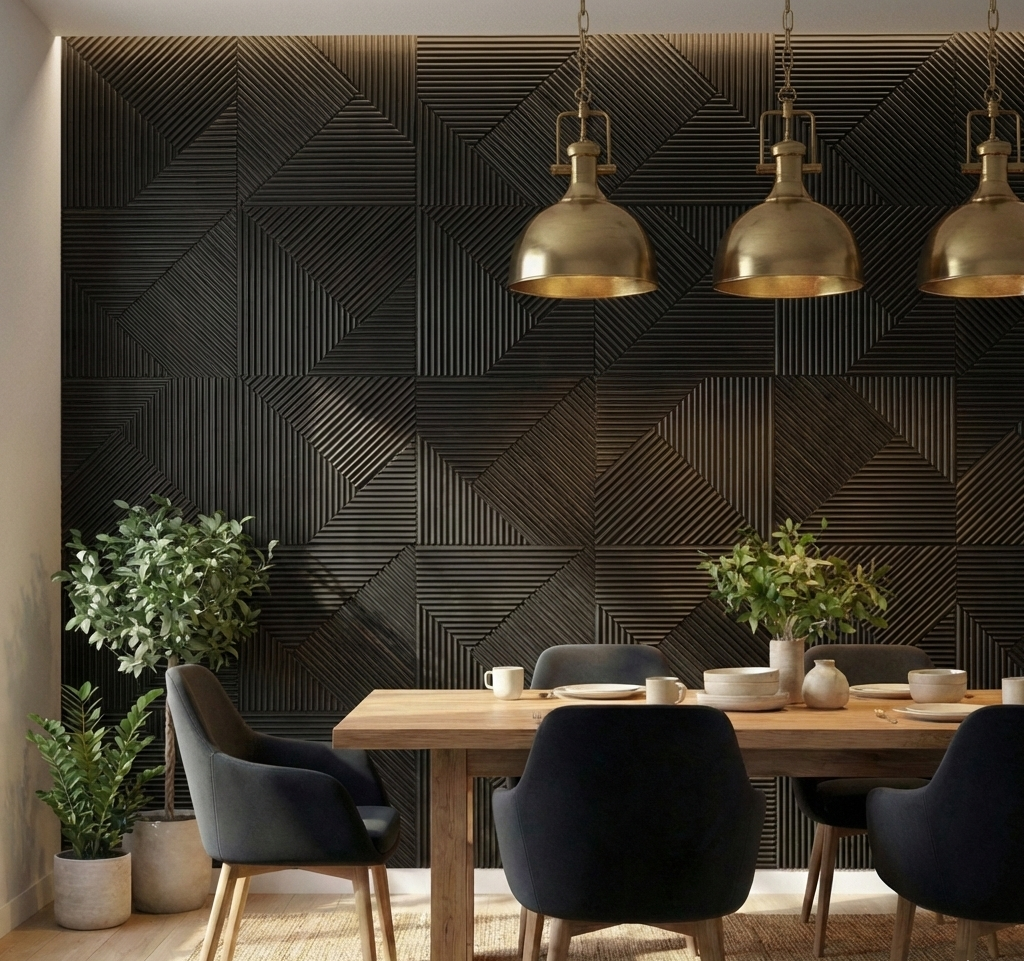
Our square 3D wall panels are 19.7 by 19.7 inches, 12 to a box (32.29 sq ft). Each is a one-piece panel of lightweight, durable PVC with a sculpted 3D relief, roughly 0.6 lb per panel. The wood-look finish is a printed wood grain on PVC, not real wood. They cut with scissors and install with construction adhesive on dry, ventilated interior walls; ceilings need mechanical fasteners as well. Adhesive isn't included, so buy a tube before install day. They aren't peel-and-stick, and they aren't made for shower or tub surrounds, floors, or outdoors. Wipe them clean with a damp cloth. See current styles.
Comparing options first? Read 3D PVC panels vs. foam panels or square 3D panels vs. slat panels.
FAQ
What adhesive should I use for 3D PVC wall panels?
A heavy-duty construction adhesive; we recommend Liquid Nails. Check that the label lists PVC or vinyl among the materials it bonds, and follow it for temperature, working time, and cure time. Adhesive isn't included with our panels.
Can I use double-sided tape instead of adhesive?
Ordinary tape alone is not recommended. The back of a 3D panel isn't flat, so tape touches only part of it and can let go over time. On walls, a very strong double-sided mounting tape (such as a heavy-duty 3M mounting tape) can work, but construction adhesive is the better choice. On ceilings, always use adhesive plus screws or mounting strips.
How long does construction adhesive take to set?
It depends on the product, temperature, and humidity. As one example, Loctite PL Premium allows repositioning for 30 to 45 minutes, calls for 24 hours of support, and cures in 24 to 48 hours. Check your adhesive's label.
Can 3D wall panels go on a ceiling?
Yes, with construction adhesive plus screws or mounting strips fastened into the joists. Adhesive alone may not hold overhead over time. They are not for suspended ceiling grids.
Can I remove 3D wall panels later?
Not cleanly. Construction adhesive is a permanent bond, and removal usually means patching and repainting the wall. In a rental, get written approval from your landlord first.
Sources
- Henkel, Loctite PL Premium Construction Adhesive technical data sheet (bonds rigid vinyl/PVC trim; application above 41°F; repositioning 30 to 45 minutes; mechanical support for 24 hours; cure 24 to 48 hours; not for areas of high heat such as fireplace openings).